Hello, my name is Jessica and I am a shoe addict. The first step is admitting it, right? Its true. Like many a woman before me, the prospect of shoes makes me positively giddy. I've been known to do a certain happy dance in the middle of a store if I find a pair that are just right for what I'm looking for. Also, like many a woman before me, I occasionally indulge in habitual shoe ambition. A term I just now made up that refers to me desire for designer shoes, but my inability to obtain such goal. I constantly put things in various online shopping bags with no intention of actually buying them. This is also because I suffer from buyers remorse. Oh what a tangled web I weave. For those of you in academia, I refer now to Adaptive Self-Regulation of Unattainable Goals. True, my shoe fetish is quite superficial in comparison, but the same principles nevertheless.
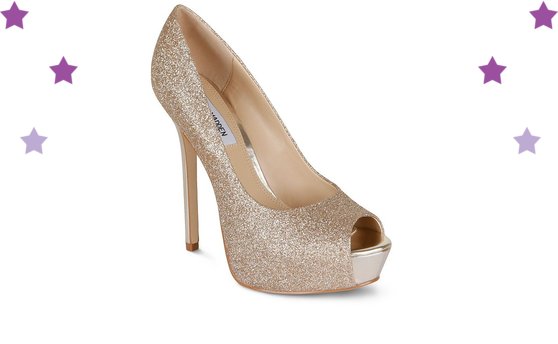
It is in this self regulation that found these beauties:

With determination and this tutorial by my side I was off in search of the supplies and some cheap-ish shoes I wouldn't mind get ruined (in the event I fail). In referenced to the tutorial listed, I skipped on the bead smith and rhinestone tray. They seemed like needless expenses and I could use things I already had in my craft drawer. Even now that its all said and done, I still feel like this chick should have just coughed up the money for the real thing after everything she spent.
Supplies I used:
Shoes - $20
E6000 Glue - $5
E6000 Glue - $5
Rhinestones (obviously) - $
Ink Pen (for picking up and sticking on the stones) - $0
I did pick up the glue she recommended, and it worked as she said. I also did not spring for the swarovski crystal rhinestones, again, my frugality got in the way, and I instead found some perfectly beautiful alternatives from Amazon for less than a third of what swarovski crystals would have cost.

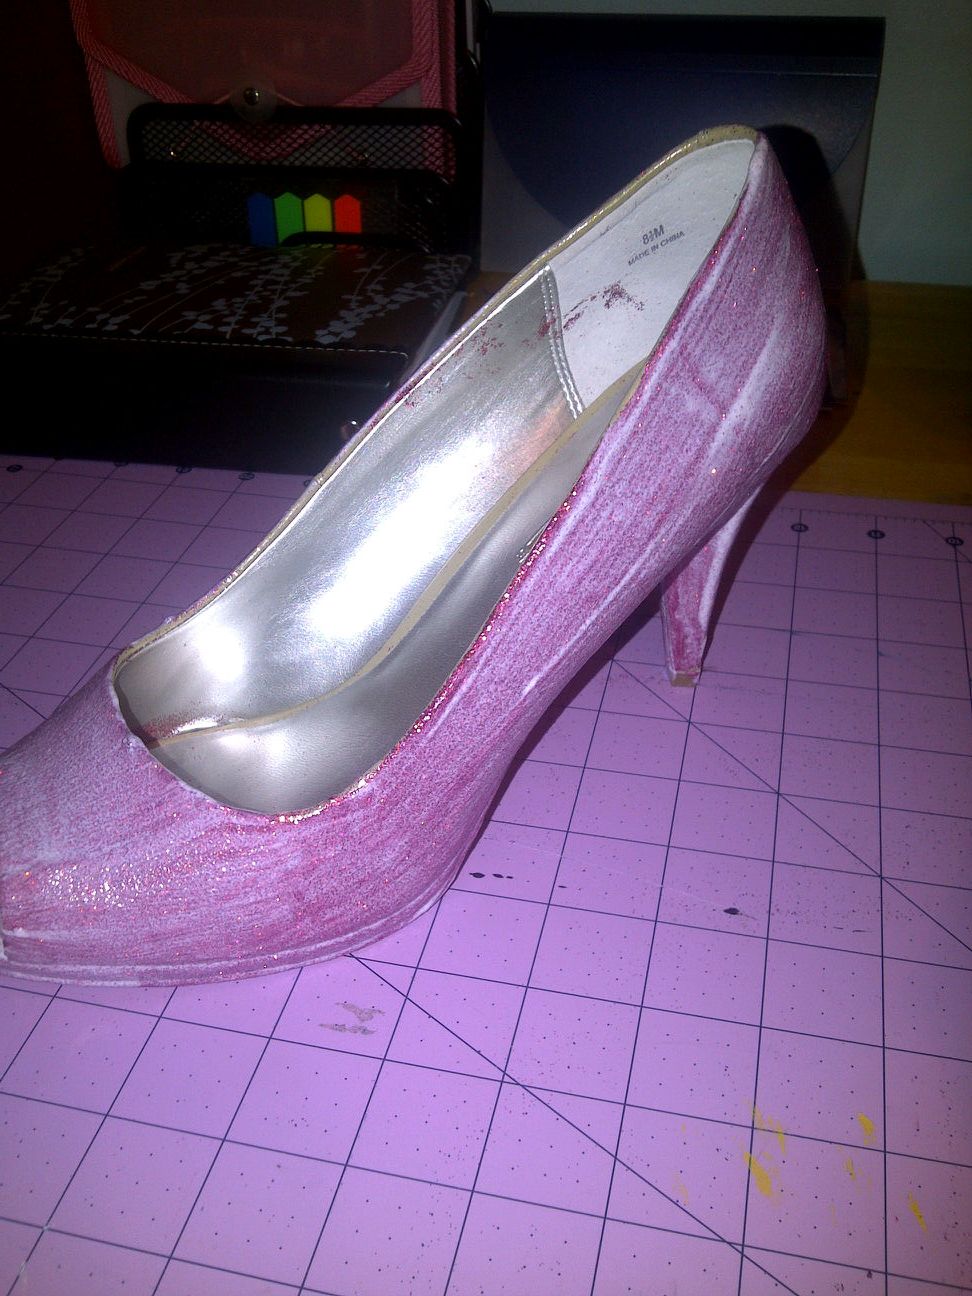
I followed the instructions, step by step when I first began. I quickly realized that what I was doing was NOT working. See photographic evidence below....


The glue was seeping between the rhinestones and they were getting out of place. My personality could not allow for hap-hazard looking rhinestones. I worked sporadically for about a week and it was just getting worse. I then began my own patent method of laying the rhinestones out on my craft table in an acceptable order, picking them up with tape and then applying them to the shoe, all in one bunch. This method worked MUCH better for me.


But, alas, by then it was too late. I already was frustrated beyond belief and did not like how the heel looked due to the placement of rhinestones. Despite encouragement from Jesse and my friends, I knew I wouldn't wear them, so it seemed pointless to finish them let alone start on the other shoe. Plus, the glue started to get really goopy which didn't help the cause. The lid wouldn't fit on the tube properly and it turned into a total hot mess. I didn't wanna fuss with it anymore. They got pushed to the side for a while. But like I said, I went the cheap route and was not too upset about the investment lost. So far $20 for the shoes and $20 for supplies is not going to break my bank. Besides, I figured I could use the rhinestones elsewhere in my craft world.
Supplies Round Two:
Shoes - $20
Glitter - $4
Mod Podge - $0 (I already had this, but its pretty inexpensive if you need to buy some)
I removed the rhinestone fail from the shoes and started from scratch. This in and of itself was harder than it sounds, those suckers were on there but good. Which I suppose would have been awesome had they turned out the way I wanted. Oh well. I didn't do anything to prepare the shoes, but thinking on it now, it may have been prudent to rough up the patent surface a little before application. I used a small sponge paintbrush, for no other reason than because that's what I had already. I applied a thin layer of mod podge in small sections on the shoe, adding glitter as I went, until I eventually covered the whole shoe. I did it in small sections in order to control the glitter explosion that somehow occurs when working with this medium. But I'm sure it'd work fine if you did the whole shoe all at once. Once covered entirely, I let it dry for about 2 hours. This was probably more than I needed to, but I wanted to be sure, and I had housework to do anyway.

After I finished laundry and dishes, I came back to the shoes. I shook off excess glitter and assessed the results. The first layer was thin, but that was ok, because I planned on doing at least 2 layers. I re-applied a second layer of Mod Podge directly on top of the 1st glitter layer and repeated the same process of doing a little at a time. This time however, I made the layer a little thicker.
Once this was dry (I let it go overnight just ti be sure) I shook off the excess and checked them out again and decided that 2 layers was enough for the look I was going for. Depending on the kind of glitter, the look you want and overall shoe design, you may want to go 3 layers. Up to you. Once I got to my desired look, I covered the shoes with another coat of Mod Podge, to seal it in. This layer dried fairly quickly, it also serves to make sure no glitter randomly falls off around your house when you walk. You could do this a second time if you wanted, but I felt like once coat was good enough for me, and I didn't want to take a chance that it get too think to see the shine of the glitter.

And there you have it... brand new glitter shoes ala Steve Madden. I'm actually really glad I ended up doing the glitter version. I'll probably be able to wear them more places... plus I'm REALLY proud of how they turned out... not to mention this second go around was much simpler and less frustraiting than my original goal :)
Total Investment: (including my fail)
approx. $44 WOO HOO
No comments:
Post a Comment